Marigolds Mastery: How to Cultivate and Maintain Healthy Flowers
Table of Contents
Marigolds are a gardener’s delight, renowned for their vibrant colors, resilience, and ease of care. These cheerful flowers not only brighten up any garden with their sunny hues but also serve as natural pest repellents, making them a practical choice for both novice and experienced gardeners. In this guide, we will delve into the art of cultivating and maintaining healthy marigold plants, covering everything from soil preparation and planting techniques to watering schedules and pest control. Join us as we explore the essentials of marigold mastery to ensure your garden thrives with these stunning blooms.
Choosing the Right Marigold Variety

French vs. African Marigolds
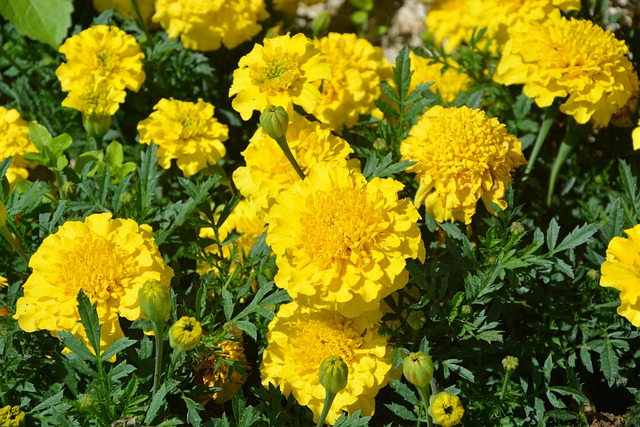
When selecting marigold varieties, the choice often comes down to French marigolds (Tagetes patula) and African marigolds (Tagetes erecta). French marigolds are known for their compact size and abundant blooms, typically growing 6 to 12 inches tall. They are perfect for borders, containers, and edging due to their shorter stature and dense flowering habit. On the other hand, African marigolds can grow up to 3 feet tall and produce large, pom-pom-like flowers that make a bold statement in any garden.
French marigolds are more tolerant of wet conditions and cooler temperatures, making them versatile for different climates. African marigolds, though less tolerant of moisture, thrive in hot, sunny conditions and are ideal for adding vertical interest to garden beds. Choosing between these two types depends largely on your garden space, climate, and desired aesthetic. Both varieties offer vibrant colors and the added benefit of natural pest deterrence.
Ideal Growing Conditions

Marigolds thrive in conditions that mimic their native habitats, which are typically warm and sunny. These flowers prefer full sun exposure, requiring at least 6 hours of direct sunlight each day to produce their best blooms. While marigolds are adaptable to various soil types, they excel in well-draining, moderately fertile soil.
To prepare the soil, incorporate organic matter such as compost to improve its fertility and drainage. Marigolds are somewhat drought-tolerant once established, but they do best with regular watering, especially during dry spells. Ensure the soil remains moist but not waterlogged, as overly damp conditions can lead to root rot.
Temperature-wise, marigolds prefer warm weather and are most productive in temperatures ranging from 70°F to 75°F. They are sensitive to frost, so planting should be scheduled after the last frost date in your area. By providing these ideal growing conditions, you’ll set the stage for a vibrant, healthy marigold display.
Selecting Quality Seeds

Choosing high-quality seeds is crucial for successful marigold cultivation. Start by sourcing seeds from reputable suppliers or nurseries to ensure they are fresh and viable. Fresh seeds typically demonstrate better germination rates and vigor. Look for seed packets that provide detailed information on the variety, including growth habits, bloom time, and specific care instructions.
Inspect the seeds for any signs of damage or discoloration, which could indicate poor quality or disease. Another tip is to check the packaging date to ensure the seeds are not past their prime. Older seeds may still germinate but often with reduced success rates.
If possible, opt for heirloom or organic seeds. Heirloom seeds preserve the genetic diversity of marigolds and often come with a rich history of cultivation. Organic seeds are grown without synthetic pesticides or fertilizers, making them a more environmentally friendly choice. By selecting quality seeds, you lay the foundation for a thriving marigold garden.
Planting and Growing Marigolds

Soil Preparation Tips
Proper soil preparation is key to growing healthy marigolds. Start by selecting a location that receives full sun, as marigolds thrive in bright, warm conditions. Begin soil preparation by clearing the area of weeds, rocks, and debris to create a clean planting bed.
Next, loosen the soil to a depth of approximately 6 to 8 inches to promote good root penetration and aeration. Incorporate organic materials such as compost or well-decomposed manure. This addition enriches the soil with essential nutrients while also enhancing its structure and drainage.
It’s beneficial to test the soil pH, aiming for a slightly acidic to neutral range (pH 6.0 to 7.0). Adjust the pH if necessary by adding lime to raise it or sulfur to lower it. Finally, rake the soil surface smooth and level it out. Well-prepared soil promotes robust root development and provides a strong foundation for your marigolds to flourish.
Proper Watering Techniques

Marigolds, while drought-tolerant, benefit from consistent watering, especially during their initial growth stages. The key is to maintain a balance—keeping the soil moist but not waterlogged. Overwatering can lead to root rot and other fungal diseases, so it’s essential to let the top inch of soil dry out between waterings.
Water marigolds early in the morning to allow excess moisture on the leaves to evaporate during the day, reducing the risk of fungal issues. Use a soaker hose or drip irrigation system to deliver water directly to the soil at the base of the plants, minimizing water contact with the foliage.
During hot, dry spells, marigolds may require more frequent watering. However, always check the soil moisture before watering again. Applying mulch around your plants helps retain soil moisture and regulate temperature. By following these proper watering techniques, you ensure that your marigolds receive the hydration they need to thrive without falling prey to water-related issues.
Optimal Sunlight Exposure
Marigolds flourish best under full sunlight, which means they require at least 6 hours of direct sun each day. Adequate sunlight not only promotes healthy growth but also enhances the vibrancy of their blooms. Inadequate light can result in leggy plants with fewer and smaller flowers.
Position your marigolds in a location that receives morning sunlight and some afternoon shade, especially in extremely hot climates. This helps protect the plants from the intense midday sun and reduces stress. If you’re growing marigolds in containers, consider moving them to sunnier spots as needed to ensure they receive sufficient light throughout the day.
In regions with milder climates, marigolds can handle all-day sun exposure without issues. However, in areas with harsh, direct sunlight, providing partial shade during the hottest part of the day can prevent leaf scorch and wilting. By optimizing sunlight exposure, you encourage robust plant health and a continuous display of beautiful marigold flowers.
Maintaining Healthy Marigolds
Pest and Disease Management
Marigolds are generally resilient, but they can still fall prey to pests and diseases if not properly managed. Common pests to be vigilant about include aphids, spider mites, and whiteflies. To control these, regularly inspect your plants and remove any affected leaves. Insecticidal soap or neem oil can effectively control these pests without harming beneficial insects.
Fungal diseases such as powdery mildew and root rot can also affect marigolds, especially in overly damp conditions. To prevent fungal issues, ensure good air circulation by spacing plants adequately and avoiding overhead watering. Mulching can help reduce soil splashing onto leaves, which is a common way fungi spread.
Crop rotation and removing plant debris at the end of the growing season can also minimize disease risks. If disease does occur, remove and destroy affected plants promptly to prevent spreading. By staying vigilant and taking proactive measures, you can keep your marigolds healthy and thriving.
Deadheading and Pruning
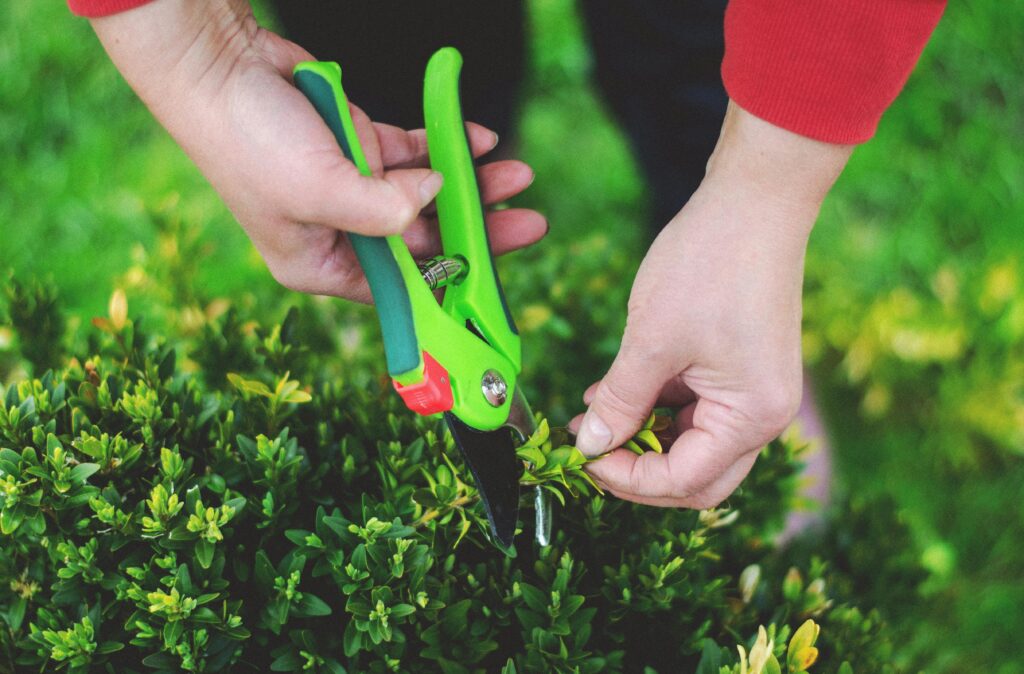
Deadheading and pruning are essential practices for keeping marigolds vibrant and blooming throughout the growing season. Deadheading is the practice of removing wilted flowers to promote the growth of new blooms. To deadhead, simply pinch off the faded flowers just above the nearest set of healthy leaves. This not only improves the plant’s appearance but also redirects energy from seed production to flower development.
Pruning marigolds can help maintain their shape and prevent them from becoming too leggy. Trim back any overgrown or straggly stems, especially in mid-summer when growth may become uneven. Use clean, sharp scissors or pruning shears to make precise cuts right above a leaf node.
Regular deadheading and occasional pruning can extend the blooming period and enhance the overall health of your marigold plants. These simple maintenance tasks ensure that your garden remains filled with vibrant, cheerful flowers all season long.
Fertilization Best Practices

Marigolds are relatively low-maintenance, but proper fertilization can significantly enhance their growth and blooming. Start by mixing a balanced, slow-release fertilizer into the soil when planting. This provides a steady supply of nutrients as the plants establish themselves.
Throughout the growing season, feed marigolds with a water-soluble fertilizer every 4 to 6 weeks. Choose a formula with balanced ratios of nitrogen, phosphorus, and potassium (such as 10-10-10) to support overall health and flowering. Avoid over-fertilizing, as too much nitrogen can result in lush foliage but fewer blooms.
Organic options like compost tea or fish emulsion are also excellent for feeding marigolds and improving soil health. Make sure to adhere to the manufacturer’s guidelines for application rates and methods. Regular, moderate fertilization helps marigolds maintain vibrant colors and robust growth, ensuring a continuous display of beautiful flowers in your garden.


